Showing posts with label gluten free. Show all posts

Friday, 7 February 2014

*PALEO* Lamingtons!


So you know that craze that's going around? The "Paleo" craze? No?

Basically it's a new-fangled diet (or rather...an old diet), which is based upon the supposed foods which palaeolithic humans ate thousands of years ago. It's a diet free of grains (i.e. wheat, rice, oats...etc.), sugar, foods high in starches (like potatoes or corn), dairy products, and other processed foods.

The concept is to eat a diet which is high in protein and healthy fats, and low in sugars and carbohydrates.


At first, it sounds daunting. I mean, I instantly began to think about all the foods I couldn't eat; pizza...cake...pizza...

However, I was actually so surprised about the amount of recipes I found which were deemed "paleo". True, I'm not following the diet super strictly - I have been living off of mango smoothies a little - but I've been doing just as much baking as before, with excellent results :)


Take, for instance, these lamingtons I made for Australia Day. I will admit, they're not at all like the fluffy, sweet, chocolatey creations you can buy for a few dollars at Coles; but they come pretty damn close, especially if you're not used to eating a lot of sugar.

And, if you feel slightly alarmed by the whole "paleo" idea, just think of these as being grain free, gluten free, sugar free and dairy free lamingtons. Actually, on second thoughts, that doesn't really sound too appetising. You get my gist, though...?

(Recipe adapted from Eat Drink Paleo because I'm not smart enough to make it up myself)


Paleo Lamingtons:

Sponge:
3 eggs
1/2 cup of tapioca or arrowroot starch
3/4 cup of almond meal
1 teaspoon of baking powder
A generous 1/2 cup of coconut oil
1/4 cup of honey
1 teaspoon of vanilla extract

Icing:
1/2 cup of cocoa powder
2/3 cup of coconut oil
2 tablespoons of honey
1 teaspoon of vanilla extract
3 tablespoons of coconut milk (I'm lazy, so I just used regular milk)

1 1/2 cups of dessicated coconut


  1. For the sponge: Beat together the coconut oil, honey and vanilla extract. In a separate bowl, beat the eggs for a good five minutes until thick and foamy, then add the coconut oil/honey/vanilla in a thin stream.
  2. Using a whisk, fold in the baking powder, tapioca and almond meal until just combined.
  3. Pour the mixture into a lined lamington tin (approximately 20cm by 30cm) at 165C for 20 minutes.
  4. For the icing: Combine the cocoa, coconut oil, honey, vanilla and milk and whisk until smooth. It is quite a runny mixture.
  5. To assemble: Cut the sponge in half lengthways. Spread chocolate icing on one half and top with the other half of the sponge, so you have one giant lamington-sandwich sort of thing going on.
  6. Cut your giant sandwich into whatever size lamingtons you like. I cut it into 2cm-wide fingers, then cut each of those fingers in half again. Set up the icing in a bowl, and the dessicated coconut in another bowl or spread on a plate. 
  7. Dip each lamington first into the chocolate, then cover it completely with coconut. They taste best if they've been left for a couple of hours for the chocolate to soak in a little, and will become quite firm if they're stored in the fridge.
So there you go. Lamingtons probably aren't the best introductory recipe to paleo-ism, but that's what I felt like and this is my blog. Deal with it! Hahaha, I kid :) Thanks for reading, and make sure you tell me what you think if you get a chance to make these beauties!


Saturday, 14 December 2013

Vanilla Bean Buttermilk Ice Cream


Summer.

Normally, I would utter that word with disgust. Honestly, Australian summer (when you don't own air conditioning or a pool) sucks so much - it's perpetually muggy, there are kookaburras at four in the morning and many, many mosquitoes. Actually, change that to a significantly large amount of all bugs in general.


However, the pros of Summer here are a) the thunderstorms (ahem - cue Sounds of Then by GANGgajang) and b) the random days, such as today, when the weather does something right and everything is pleasant. No, really, for the past few days there have been clear skies and it's been hot but not humid and I've been to pool parties and been Christmas shopping and everything is just nice. It's times like these I feel especially patriotic. And trust me...there are many times I don't feel particularly patriotic. Like when I find spiders in my bed. Yeah. Not cool, Mr Spider.


Anyway, I bring this post to you as a peace offering (it's been a whole month already since my last post. Can you believe it?), although in my defence my computer was 100% kaputt for most of that time. Like, my hard drive just casually upped and died and now I have to start from scratch again...oh well.

So yes. This recipe is perfect for summer, and exceedingly easy to make. Give it a go - even if you're one of those privileged people who live in the Northern Hemisphere where it is nice and snowy :) I'm definitely going to do a proper Christmas post this year, so I'll see you then!


Live long and prosper,
Kenz x

(Sorry. I've been watching too much Star Trek. It sort of just slipped out.)


Vanilla Bean Buttermilk Ice Cream

600ml of buttermilk
The seeds of 1 vanilla bean / 1 teaspoon of vanilla paste / 2 - 3 teaspoons of vanilla extract
300ml of cream
1 cup of caster sugar


  1. In an electric mixer, beat the buttermilk and sugar for 2 minutes, or until the sugar dissolves. Stir in the cream and vanilla.
  2. Pour into an ice cream maker and follow the directions for the machine; alternatively, pour into a freezer-safe container and freeze for a few hours, or until mushy. Beat or whisk the icecream until smooth, then freeze for a few hours more. Repeat the process 2 - 3 more times, until no more ice crystals form.
  3. Keep in the freezer in an airtight container.
Just as a side note, this tastes amazing with crushed Maltesers mixed through. I don't know why, but it does.


Monday, 9 September 2013

Salted Caramel Popcorn

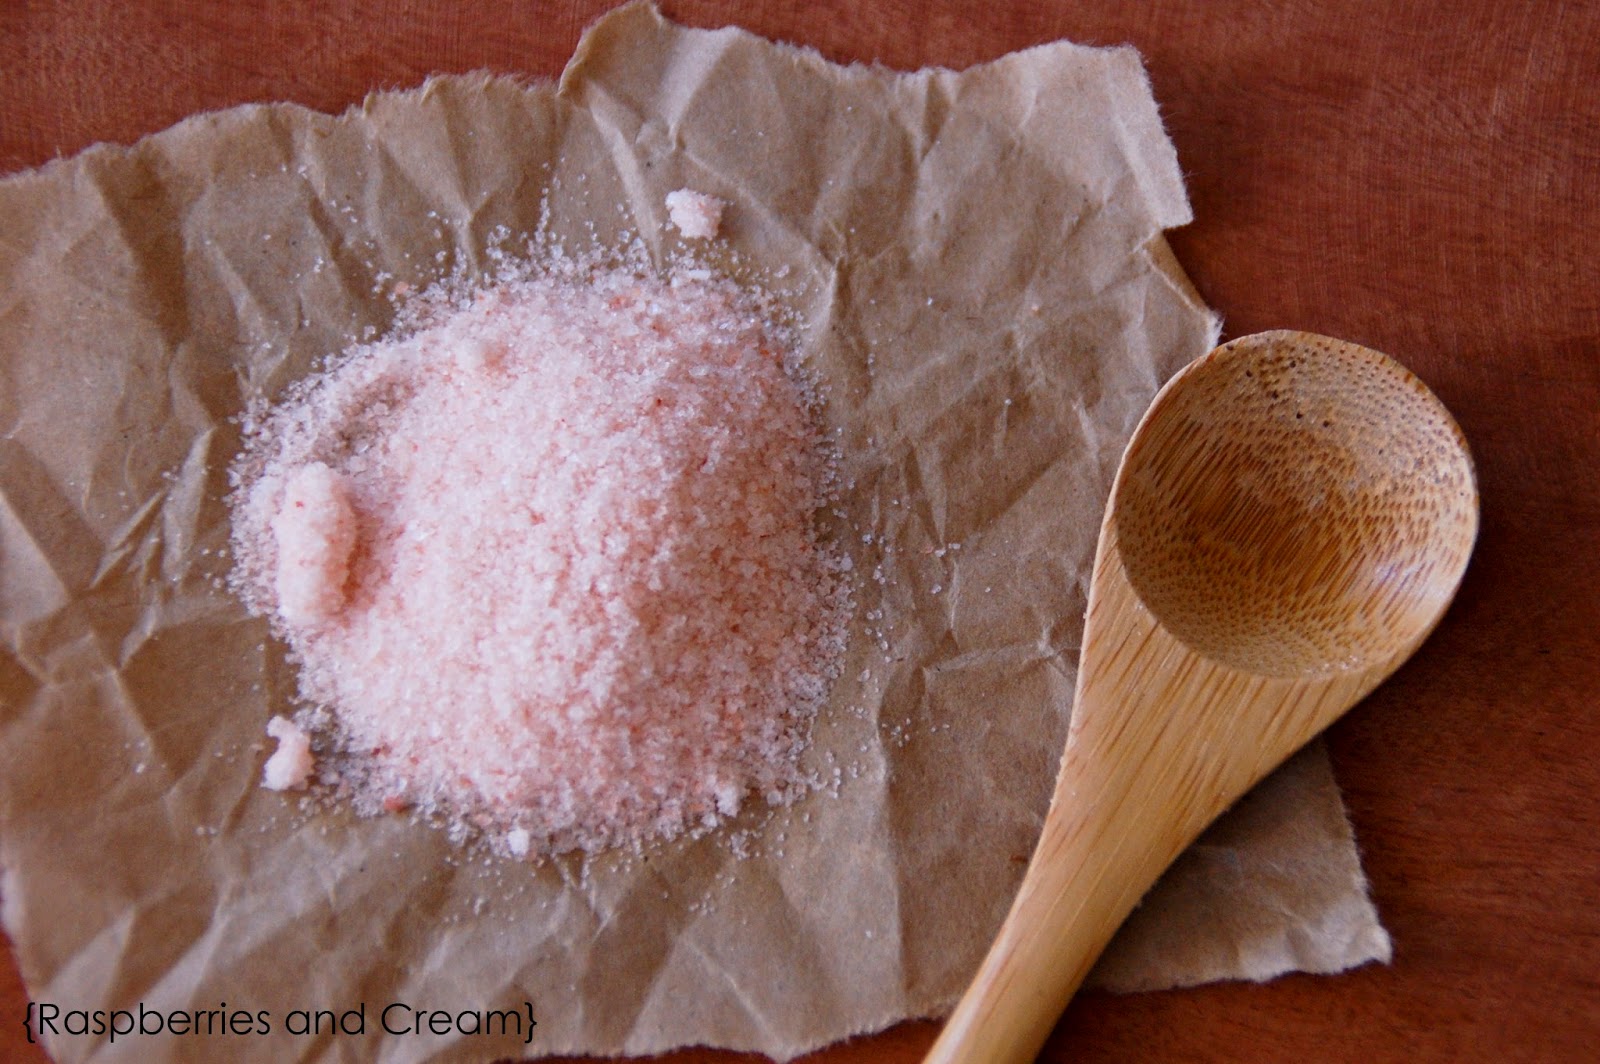
Today, I discovered that our salt was pink.
(Why it's pink, I don't know. Just go with it.)


How did I discover this? Because I was making salted caramel popcorn.


Why was I making salted caramel popcorn? Well, because I was hungry, I suppose. I don't really know.

Why was I hun okay, I'll stop now.

Basically, to explain my ramblings a little bit, exam block is the best. As impossible as that sounds, I love exam block because I get to stay home from school when I have no exams and it's the best. feeling. ever.
And as everybody knows, the best brain food for the exam-ing mind is caramel popcorn, with extra salt on top because hey, who needs to be individual when you can follow the putting-salt-on-sweet-foods-where-it-shouldn't-go-craze...?

But in all seriousness, this stuff is surprisingly easy to make, and is even easier to eat, which is not as surprising. Just two words of warning, though...highly addictive.


Salted Caramel Popcorn

115g of butter
1 cup of brown sugar
1/4 cup of glucose syrup (the original recipe said corn syrup, but glucose seems to work and I don't know what the difference between them is, soo...)
1/4 teaspoon of bicarb soda
1 teaspoon of vanilla extract
1 cup of unpopped popcorn kernels
1 teaspoon or so of sea salt, to sprinkle on top.


  1. Preheat the oven to 95C. Pop the popcorn (either in a popcorn machine or on the stove, in a saucepan with a little bit of  oil), and place in a large (large!) bowl.
  2. Melt the butter in a saucepan. Stir in the brown sugar and the glucose syrup, and bring it to the boil, stirring constantly. Boil without stirring for 2-3 minutes, then remove the caramel from the syrup and stir in the bicarb soda and the vanilla.
  3. Pour the caramel in a thin stream over the popcorn and stir to combine. Place the popcorn in a single layer on baking trays (lined with greaseproof paper, caramel is hard to scrub off), and sprinkle all over with the salt. Bake for one hour, stirring every fifteen minutes.


Monday, 22 July 2013

Muffins

Yo.


So are you ever baking, and have the sudden realisation of how much butter you just put into that bowl of icing? Or pour a couple of cups of sugar into the fudge and wonder, "Is this stuff seriously all that great for me?"

I'll admit it, those thoughts don't come around very often. Generally, I'm more that happy to use a couple of blocks of butter for croissants, or pour a container of cream into the caramel sauce. However, I stumbled across this recipe a while ago and I was intrigued by the ingredients...or lack thereof. Since then, I've been refining and perfecting the recipe to my taste and am super excited to present it to you :D

Let's get cracking!


Ingredients:

2 1/2 cups of rolled oats
1 cup of plain Greek yoghurt
2 eggs
1/2 cup of sugar
1 1/2 teaspoons of baking powder
1/2 teaspoon of bicarb soda
Flavourings: this time, I did raspberry and white chocolate  in one batch, and apple and cinnamon in another. However, you could very easily change the recipe to add blueberries, mashed bananas, chocolate chips, macadamias...whatever your little heart desires! ;)


  1. Line your muffin tins with foil or silicone liners - paper just doesn't seem to work very well with this recipe. If you don't have foil or silicone, then just grease the baking tins well with butter or oil.
  2. Put all of the ingredients excluding your flavourings (eg, raspberries and white chocolate chunks) into a blender or food processor and and process until the oats are smooth. The mixture will be quite runny, but if you let it sit for ten or so minutes, the oats soak up the moisture to make a thicker batter.
  3. Stir in the flavourings. I had about 1/2 cup each of raspberries and chopped chocolate for one half of the batter, and then finely chopped up a green apple and added a teaspoon of cinnamon for the other half. They were both delicious!
  4. Spoon the mixture into the muffin tins and bake at about 175C for 25-30 minutes.


Wednesday, 12 June 2013

Apologies and Tomato Chutney.


Wow.

Okay, I'll admit it: you guys have been sorely neglected. Two months since I last gave you a new post? Utterly ridiculous.

However, in my defence, I have been writing a 25-page-long Ancient History assignment (why oh why did I choose Ancient History?) and reading Les Miserables. That, my friends, is a long book - but totally worth it :)

However, seeing as I have a German exam in, like, an hour, I'd better get cracking with the recipe. For some reason, people in our house have a tendency towards consuming large amounts of chutney on their sandwiches - so much so, that Mum was buying practically a new jar every week. I have no idea why this is so, but I decided, why not just make our own? It's way cheaper, easier, and makes more than what we would usually buy. Basically, what I'm saying is, I've made this recipe so many times I can do it with my eyes shut, so why don't you guys give it a go? :)


Tomato Chutney

1 kilo of ripe tomatoes, peeled (see Note for how to peel tomatoes)
1 1/2 cups of sugar
1 cup of apple cider vinegar
1 large clove of garlic, crushed
1 teaspoon of salt
A sprinkle of cayenne pepper (I've learned from experience that it's hotter than you'd think - if you don't like spicy things, then stick with a sprinkle)
1 teaspoon of ground ginger


  1. Dice the peeled tomatoes and combine in a big pot with the sugar, vinegar, garlic, salt and cayenne pepper. 
  2. Bring the mixture to a slow simmer and cook, stirring, until the syrup thickens a little and the tomatoes are reduced to a sort of pulp. This can take from 45 minutes up to 2 hours.
  3. Add the ginger and cook for another 5 minutes. Remove the chutney from the heat and ladle into hot sterilised jars.
  4. Keep in the refrigerator; makes about 2 1/2 cups.
Note: To peel tomatoes: cut a cross-shape in the base of the tomatoes (the opposite end from the stem). Place the tomatoes in a pot of boiling water and let them boil for about 30 seconds, or until the skin begins to blister and peel off. Move them into a colander in the sink and run cold water over them while you peel the skin off with your fingers. Make sure there are no blemishes or mould growing on them - if there is, then cut it out. To sterilise jars: making sure the jars have been washed and are completely clean, place the jars and their lids in an oven at 100C for around 5 - 10 minutes. Please note, though, that if you put cold glass jars straight into a hot oven, they will crack, so put them in the oven when it is cool and warm the oven up with them inside.


Thursday, 27 September 2012

Blood Orange and Rosemary Marmalade


I don't like marmalade. It tastes like jam, but it's got orange peel and pith in it. Ugh.

However, I love making it. I love making jams, and jellies, and preserves, and, well, marmalade. Maybe that's just me, being old fashioned - but I think it's fun.

I've actually made this marmalade before, but I think that was about two years ago, because we kept missing the blood oranges. I mean, seriously, they're in season for about a week, and if you miss them like I kept doing, you have to wait another whole year before they come back again (which sorta sucks, but whatever).

So, here it is. The promised post. It would have been sooner, except I was away on holidays (they were really nice, I'm glad you asked), and I had no internet, not to mention no computer or marmalade, so I couldn't do it then. Sorry about that.

I'll shut up now and give you the recipe.

Blood Orange and Rosemary Marmalade

6 blood oranges, sliced very finely
1 lemon, sliced just as finely
2 cups of water
Between 3 and 5 cups of white sugar (don't worry, I'll explain later)
3 tablespoons of red wine vinegar
A few sprigs of fresh rosemary


  1. Put the finely sliced oranges and lemon into a big pot with the water. Cover with a cartouche (I'd never heard this word, but when I googled it, Google said to cut a circle of baking paper two inches bigger than the pot you're using, scrunch it up and then pull it back out flat again - and there you have it. Apparently it helps reduce the amount of liquid that evaporates or something), the lid, put on a low heat and let it boil for a hour.
  2. After an hour, test the rind - you should be able to squeeze it easily between your fingers. Take the pot off the heat, and measure out the liquid&pulp&rinds (basically, measure out how many cups not-quite-marmalade you have). For every cup of mixture, use 3/4 cup of sugar. For example, if you have 5 cups of mixture, you'd have 3 1/4 cups of sugar. 
  3. Put the sugar and mixture back into the pot, and add the red wine vinegar and rosemary. On a medium-high heat, bring to a slow simmer and let it cook for 20-25 minutes. Test to see if the marmalade has gelled by dropping some of the liquid onto a cold (as in, it's-been-in-the-freezer cold) plate, and push your finger through it. If it has little wrinkles, or if it seems to be the regular consistency for marmalade, then take the pot off the heat and ladle into sterilised jars. Keep in the fridge.
(Note: if you're unsure about how to sterilise jars, here's a link that explains it pretty well)


Monday, 31 October 2011

{Scrambled Eggs}

Finally! A proper post about a recipe that includes a picture. It really has been busy, what with assignments, and umm, homework, and umm, more assignments, and, er, books to be read....
Anyway, 'nuff said, or really, 'nuff complaining; I shall deliver the next recipe to you right this instant. I must say, personally, I hate scrambled eggs. Every time I've eaten them they're watery and gross. But these are the creamiest, the easiest and the tastiest scrambled eggs I've ever made; or eaten, for that matter, if I do say so myself.

Scrambled Eggs

1-2 eggs per person
1 tablespoon of butter per egg

  1. Melt the butter in a frying pan on low to medium heat. Crack each egg into the pan individually; if they are beaten beforehand, they go tough, likewise if milk or cream is added.
  2. Gently break the yolk once the eggs have hit the bottom of the pan. Wait until the whites have just started to set, then gently stir the eggs so that they are evenly cooked. Stir the butter through at the same time.
  3. Do not over stir eggs. They should be lumpy and a mixture of white and yellow. Let them cook until they are not quite set--they will continue cooking once served, from their own heat. Serve on or beside toast or english muffins. Sprinkle salt, pepper and/or chopped herbs on top. If the pepper is added whilst cooking, it will go bitter.
And that's it!

Ta-da! Upside-down knife & fork and everything!!

ShareThis